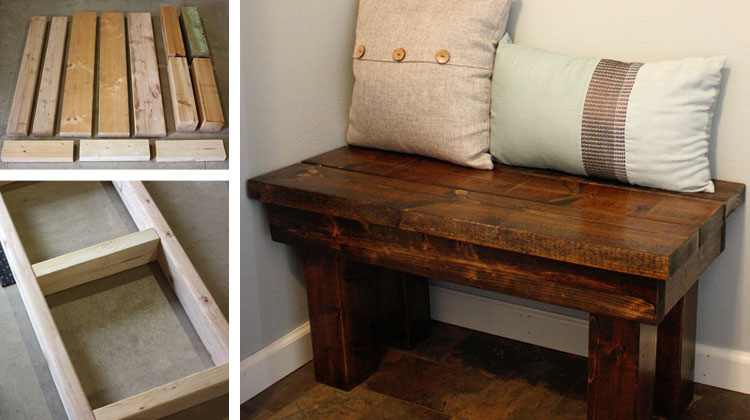
We recently transformed our entryway closet into a mudroom, and I instantly knew I wanted to add a bench. Getting out the door with two little boys is a nightmare challenge and maybe it’s just me but trying to squeeze toddler shoes on a squirming 1-year old and irritable 2-year old is downright impossible. Most days I would end up sitting on the floor basically trying to grab the nearest kid while simultaneously sweating. Before I had kids I never imagined that simply leaving the house would cause sweating, but now I know better and always double up on deodorant. The bench has helped our morning routine immensely, the boys enjoy sitting on it and it makes putting their shoes on so much easier when they aren’t running around. (Disclaimer: this bench does not prevent tantrums about socks fitting wrong or not wanting to wear a hat, just sayin’).
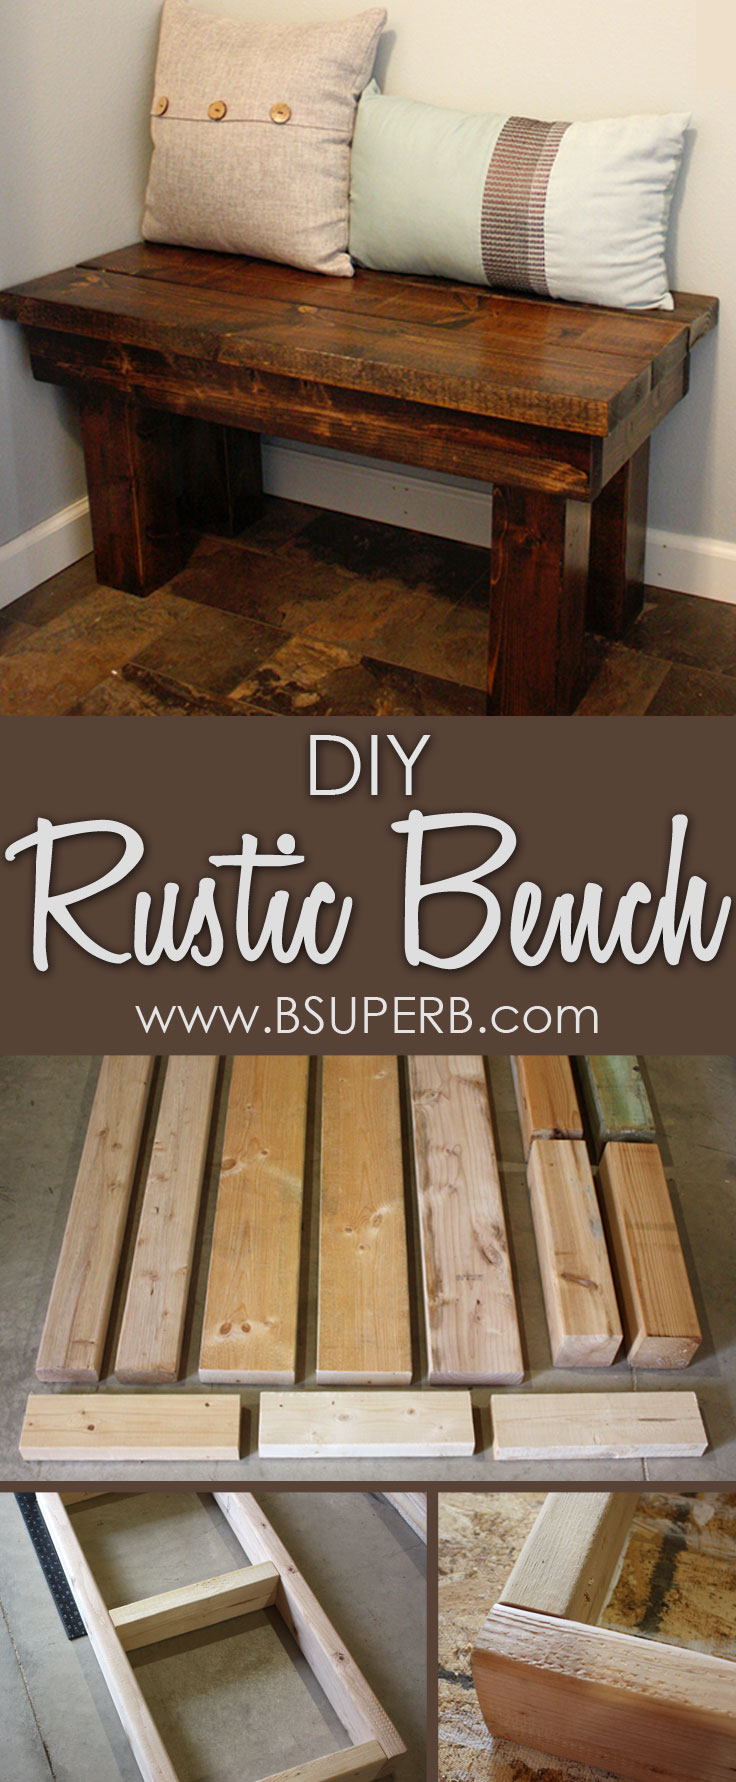
Here is how created our rustic entryway bench.
What you need:
- 4 – 4 x 4 Posts cut to 16″ each
- 3 – 2 x 6 boards cut to 33″ each
- 2 – 2 x 4 boards cut to 31″ each
- 3 – 2 x 4 boards cut to 12″ each
- Approx. 30 3-1/2″ torx screws
- Foam Brush
- Bristle Brush
- Rag
- Tack Cloth
- 220 Grit Sandpaper
- Wood Stain
- Varnish
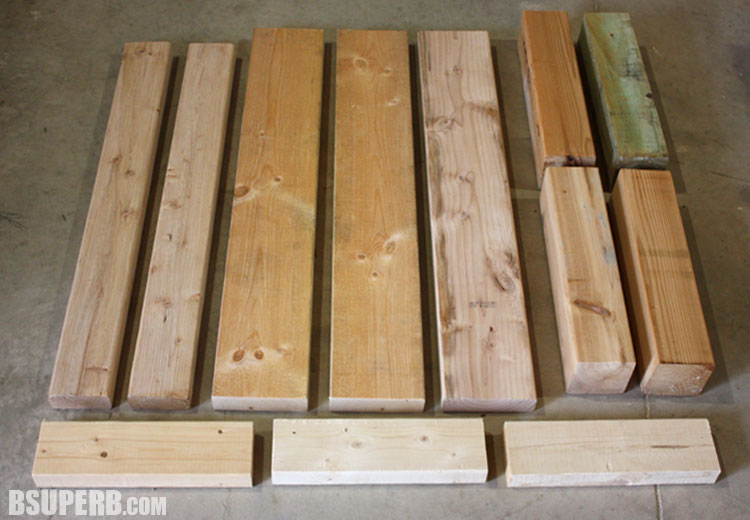
For the 4×4 posts and 2×6 boards we used reclaimed wood. If you are at a hardware store ask if they have any reclaimed wood, or in our case we found a big bin on an end of the aisle that was full of reclaimed wood. This is a great way to get cheap wood that has character.
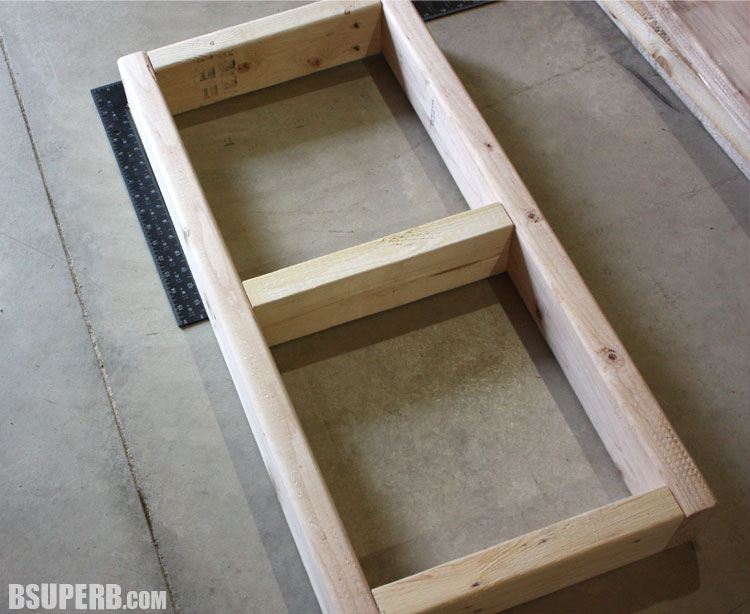
Start by building the frame of the bench. The 31″ 2x4s should go along the sides, and the three shorter 2x4s are for the ends and one brace in the middle.
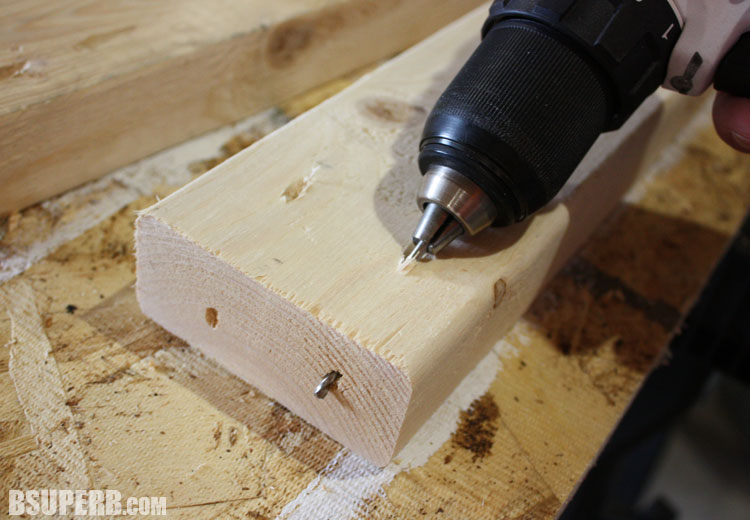
If you don’t want the screws to show on the outside of the frame you should use a Kreg jig so that you can make pocket holes. We do not own a Kreg tool, so we experimented with drilling holes at an angle. Basically, start the drill bit straight down into the wood and then turn your drill toward the angle that will get the bit to come out in the middle of the end of the board.
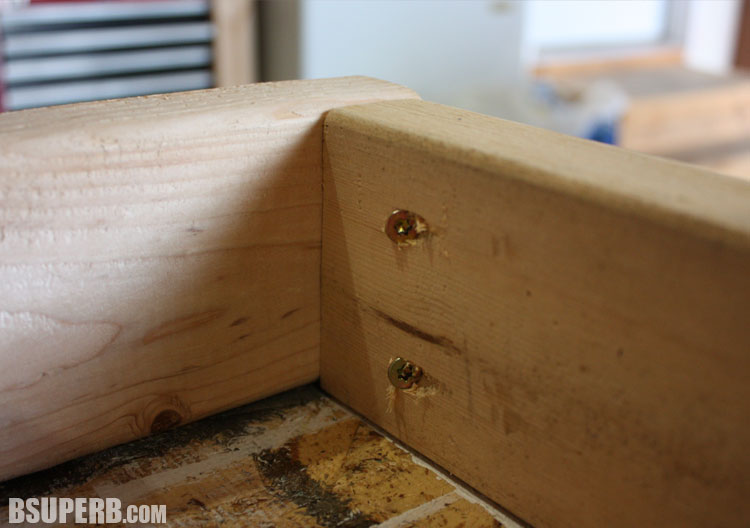
Once the angled holes were drilled we were able to add screws. These screws are on the inside of the frame, so screw holes are not visible once the bench is assembled. Obviously a Kreg jig would have been ideal, but our makeshift method worked great for us.
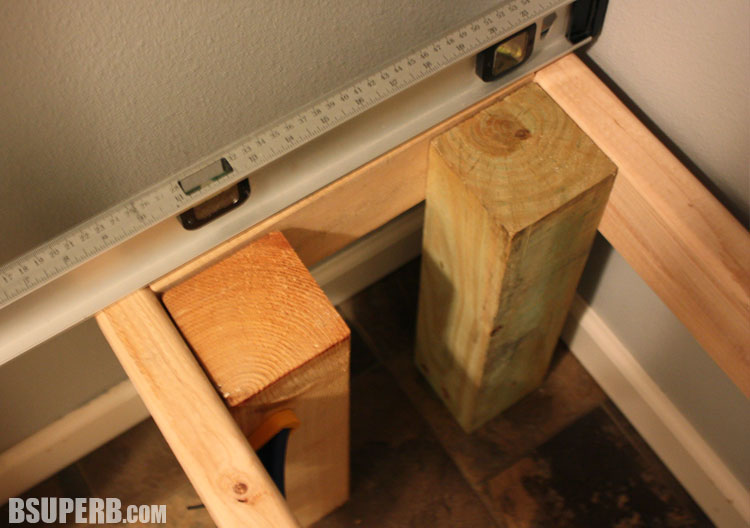
Once the frame is built add the four 4×4 posts to the inside of the frame. Using clamps helps keep everything in line and level while you are screwing them in. You can choose to screw from the outside of the frame into the post (keeping in mind you would have the screw holes visible). We decided to screw the posts from the inside, angling the screws in on the two exposed sides of the post to the frame. You want to make sure that tip of the screw doesn’t go through the frame if you are using this method.

For the top, we laid down the three 2×6 boards and placed the frame on top. We were able to measure all four sides and make sure all the boards were evenly spaced before we put in the first screw. Once everything was in place we put in angle screws from the frame into the top boards, making sure that those top boards didn’t budge.

You now should have an assembled bench! We did a a little sanding (especially on the ends of the 2×6 boards). Next was the staining. We chose Minwax Wood Finish Penetrating Stain in Dark Walnut color. Brush the stain on with a foam brush, let it absorb into the wood for 5-15 minutes, remember that the longer the stain is left on the deeper and richer the color will be. Do not let the stain dry or even start getting sticky, you should rub it off with a dry rag (we used an old cut-up t-shirt) when it is still wet. Be sure to follow the wood grain while wiping off all the excess stain.
Let the stain dry. Now is the time to decide if you would like a second coat (wait 4-6 hours after the first coat). The reclaimed wood really soaked up the stain, so we decided to skip the second coat.
Let the stain dry for at least 8 hours. Next you need to add the protective finish, remember that once the polyurethane finish goes on it is too late change the stain color, so make sure you have it the color you want. To prep the bench use a tack cloth to wipe away all the dust. Please do not skip this step, even if you don’t think the table has any dust, you’d be amazed at what the tack cloth still picks up. If you have even a little dust it will create bubbles under the varnish and won’t have a smooth finish.
Apply a thin layer of the varnish, I used Minwax Polycrylic Clear Semi-Gloss, with a high-quality synthetic bristle brush in the direction of the wood grain. Use a light hand when applying the protective finish, I always imagine I am brushing varnish on a thin sheet of paper. Try to not over-brush, even if you think there is an imperfection in your varnish job, brushing it over and over will only create more bubbles and rough spots…just move on and keep brushing (the first coat feels pretty bumpy and rough, you really start to see the smoothness in the second and third coats).
Let the varnish dry for at least 2 hours and then sand with a very fine sandpaper (220 grit) to help get any bubbles out. Remove the dust with the tack cloth again. You are now ready for another coat of varnish repeating the directions in the previous paragraph. We did three coats of varnish and I love how it turned out.
Let the the bench dry for 24 hours before handling it to make sure the varnish is completely dry. Try adding a few decorative pillows to really help the bench look welcoming. (Disclaimer: toddlers will throw the pillows on the floor or at each other). ![]()


Great looking bench Bree!