I always see the plain wood crates at craft stores and think that it would be cute to stain them, but when I pick them up they just feel so flimsy and not worth the price. After a little searching I found a tutorial on how to make a wood crate over at A Shade of Teal, and that got my wheels turning on how I could create my own.
Things you need:
- 1 x 12 (actual size: 3/4″ x 11 1/2″) board – 4′ length
- 1 x 3 (actual size: 3/4″ x 2 1/2″) board – 10′ length (or two 6′ lengths would work)
- Finishing Nails
- Hammer
- 150 grit sand paper
- Wood Stain
- Foam Brush
- Rag
- 2 decorative handles and screws
Start by making all of the appropriate cuts to the boards. From the 1 x 12 board you need to cut an 18″ piece, and two 10 1/4″ pieces. From the 1 x 3 board you need to cut six pieces that are all 19 1/2″ long.
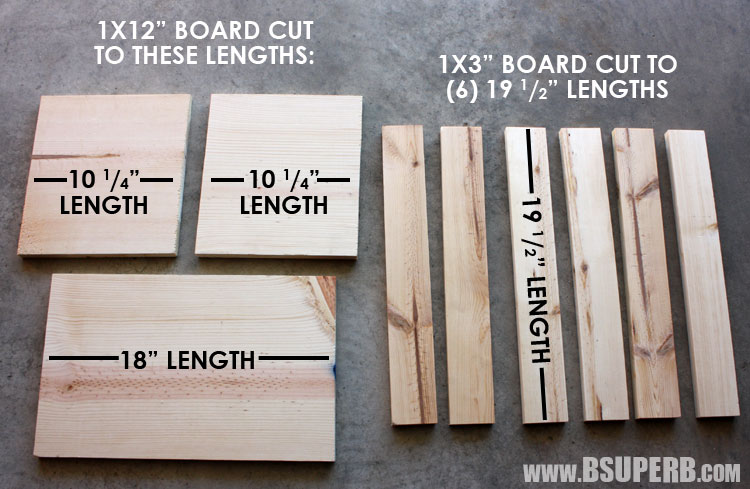
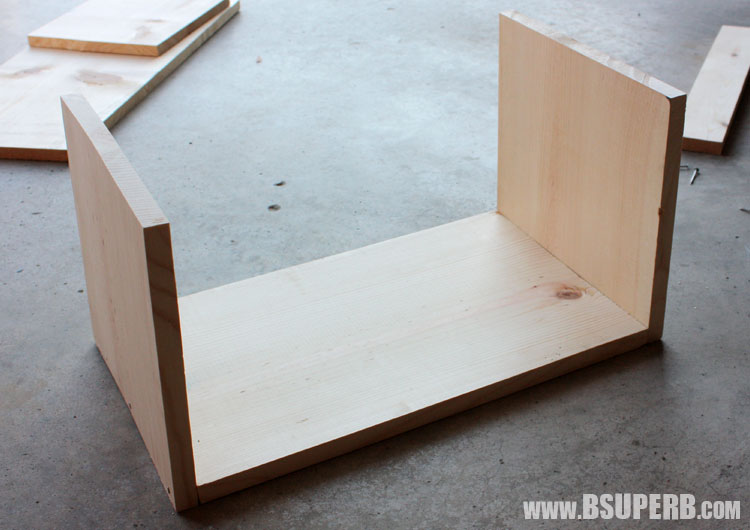
The 18″ piece is the bottom, the two 10 1/4″ pieces are the ends, and the six 19 1/2″ pieces will be evenly spaced along the sides. Let’s start assembling! Line up the 10 1/2″ end board to the bottom 18″ board. Pound in three nails, one on the each end and one in the middle. Repeat on the other side.
Next take one of the skinny boards and place it over the base and two ends. Nail it in place (I used two nails on each end).
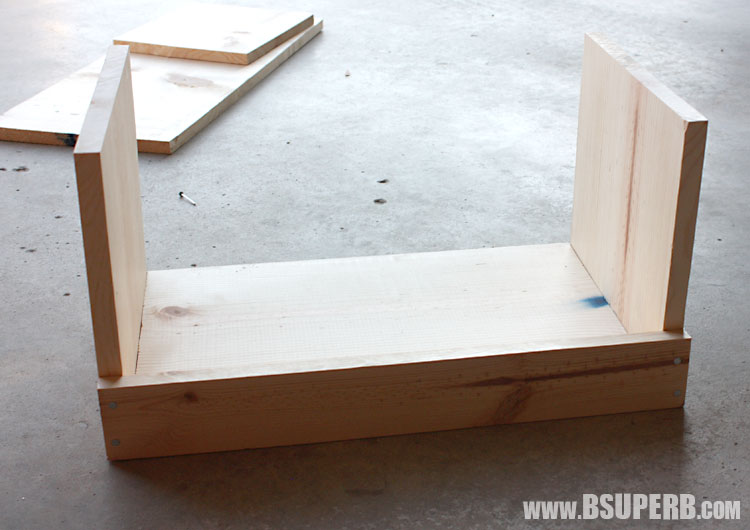
The next board I nailed into place was at the very top. I did this for two reasons, 1) the end boards are still a little wiggly at this point, so nailing the top board helps keep the crate’s structure in place, and 2) it is easier to center the the 3rd board when you already have the top and bottom in place.
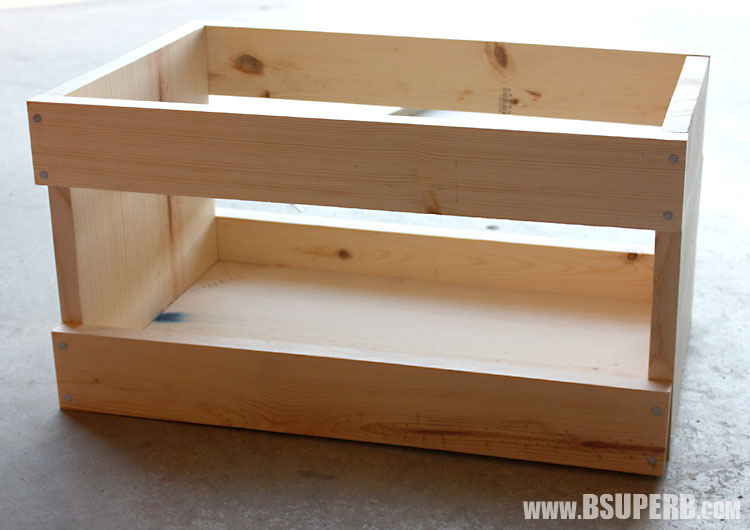
I repeated this on the other side as well. When it comes time to hammer on the middle board, you could use a measuring tape and pencil to mark where center would be. But honestly, I placed the crate on it’s side (so it would be easier to hammer), and then just eye balled where I thought the board looked centered. My woodworking-master father probably won’t approve of this technique, but it worked for me! Repeat on the other side.
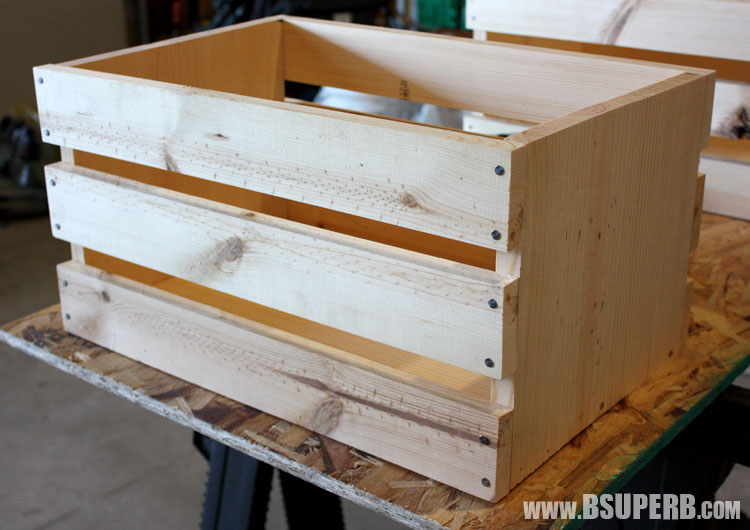
Now the crate structure has been built, not too shabby! Take the sandpaper and run it over the edges and surfaces to smooth and soften them up. Wipe the dust off with a rag or paper towel. Next is making it pretty…the stain! I used Minwax Wood Finish Penetrating Stain in Dark Walnut color. I applied it with a foam brush, brushing it over all areas of the crate both inside and out. I usually let stain sit and penetrate the wood for 10-15 minutes, but it took that long to brush stain over the whole crate. So almost immediately after stain was applied to all areas of the crate I used a rag to wipe away the excess stain. Let the crate dry for at least 24 hours.
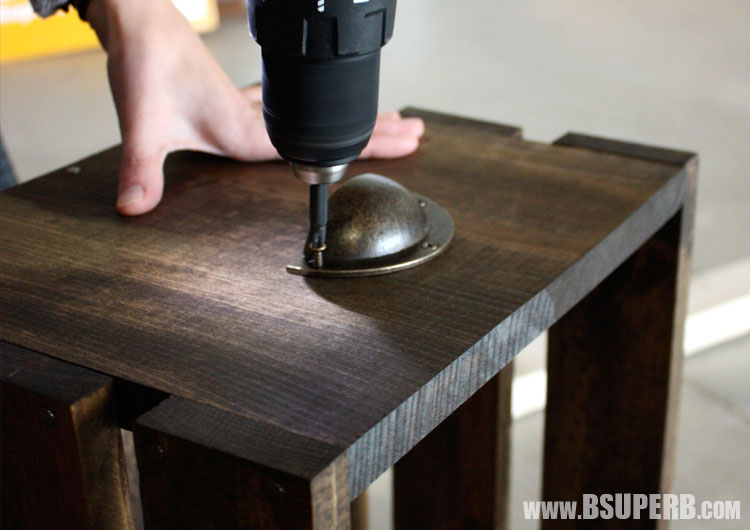
Once the stain is dry it is safe to screw on the handles of the crate. Remember that the end boards are only 3/4″ thick, so you need to make sure you have short screws so they don’t poke through the wood.
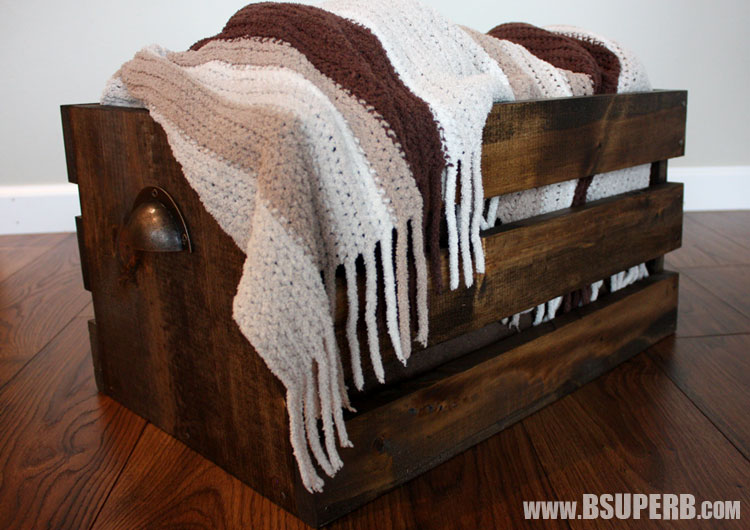
That is all it takes to create a beautiful, homemade crate. It’s a stylish place to keep extra blankets, magazine, or toys.


Love these projects and pictures on how to put it together
how much did it cost roughly to put this all together?