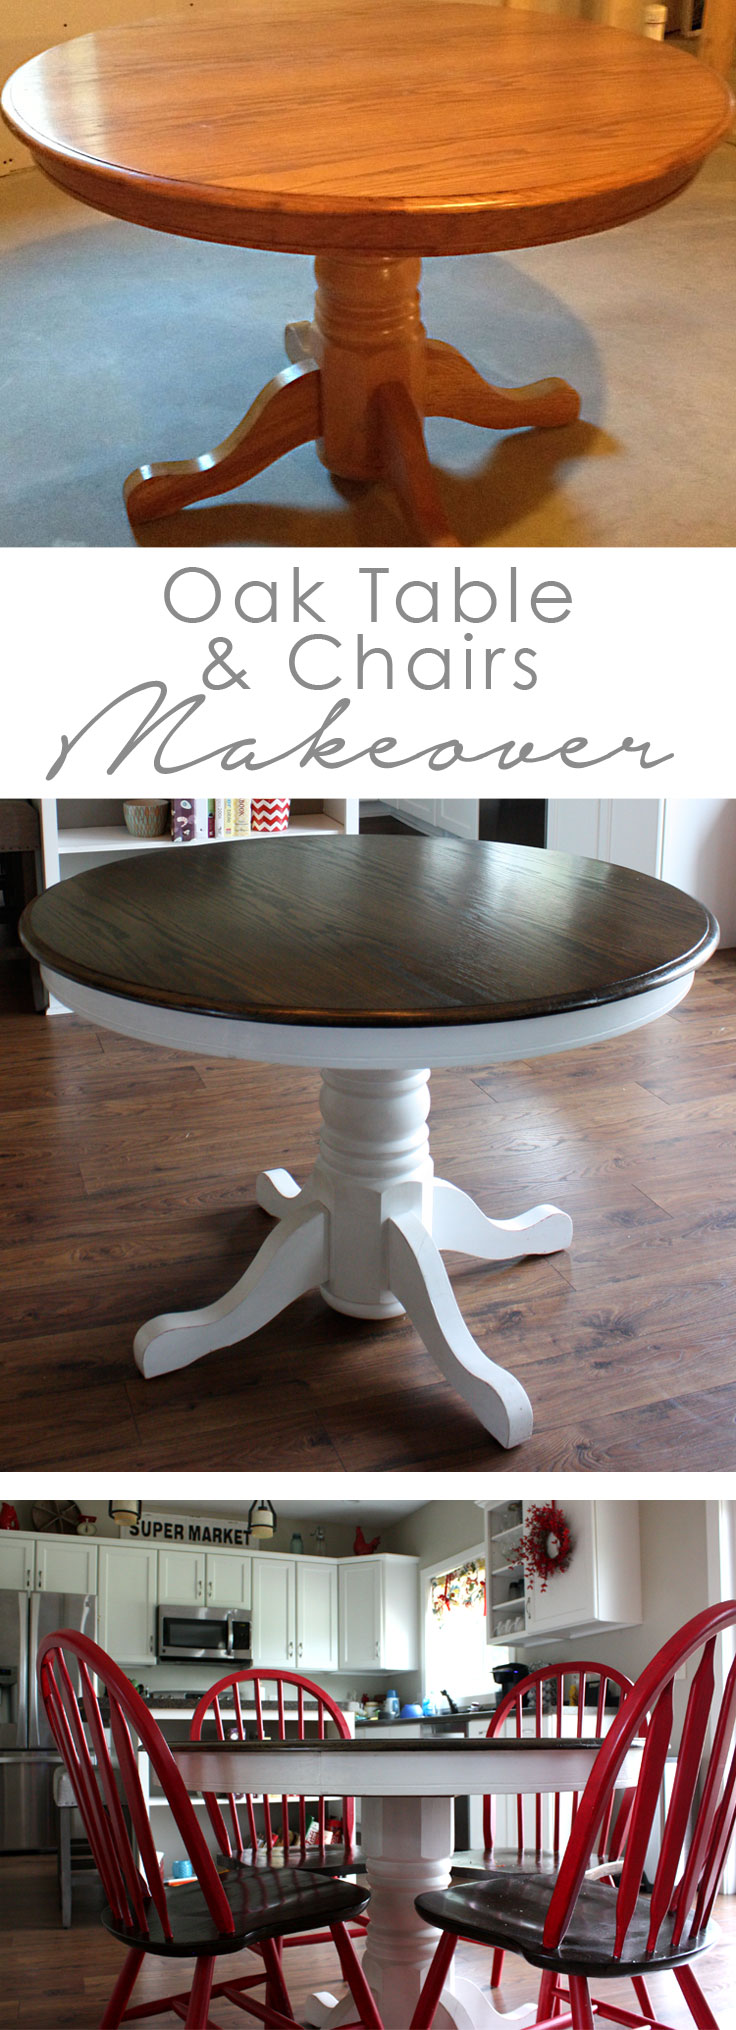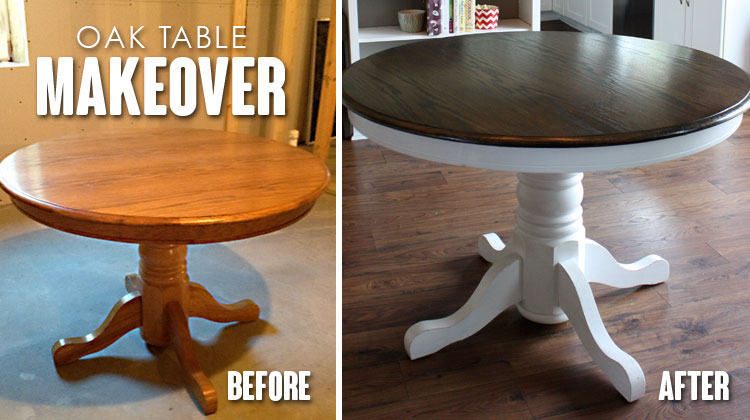
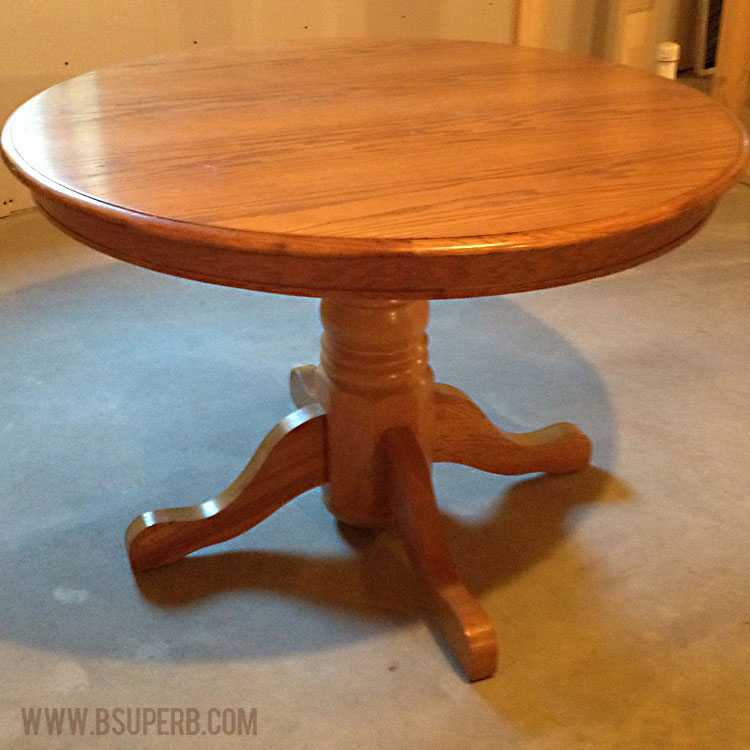
Even though there was nothing wrong with my small oak table, it was just time to give it a facelift. Please don’t be intimidated by a project this size, this was the first project I tackled after we bought our house and it was very doable for a beginner DIYer. The hardest part was all the elbow grease to strip the varnish off of the table. But having sore arms felt like a DIY project and a killer arm workout rolled into one! Here are the steps for refinishing a tired oak table.
Materials Needed:
- Foam Brush
- Bristle Brush
- Paint & Varnish Remover
- Stripping pad
- Rag
- Tack Cloth
- 220 Grit Sandpaper
- Wood Stain
- Varnish
- Paint & Primer
Instructions:
Wipe the table clean.
Use a foam brush to spread the varnish remover everywhere on the top of the table (or everywhere you plan to re-stain), I used 3M Safest Stripper Paint & Varnish Remover. Let the solution soak in for an hour or two.
Use a stripping pad (I used the 3M brand) and start scrubbing the wood back and forth going with the wood grain. (Note: some stripping solutions allow you to use steel wool for this process, the 3M solution I used does NOT allow steel wool because it will scratch. So be sure to check what it says on your varnish remover.) Like I said earlier, this is the hardest and most time consuming step. It gets pretty messy because you are stripping off all of the glossy varnish that was on the table. Once I felt like I had gotten quite a bit of the old varnish/stain off of the table I took a wet rag to wipe off all the 3M varnish remover. If you are like me, you will see several spots that you missed.
If you find any spots of varnish or stain that you missed, spread more 3M varnish remover on the table concentrating on those areas, and let it soak for another hour or two. Use the stripping pad and get in there with more elbow grease. You HAVE to make sure you do a really good job getting all the varnish off, because the new stain color will not soak into those areas and the table will end up looking splotchy.
Rinse the stripping solution off really well with a rag and water. At this point you will probably be more than ready to be done with stripping off the varnish and solution. I found a few more spots that I missed and was very tempted to “call it good” and leave it as is, but I was happy I took the extra time to get 100% of it removed because the finished product looked so much better.
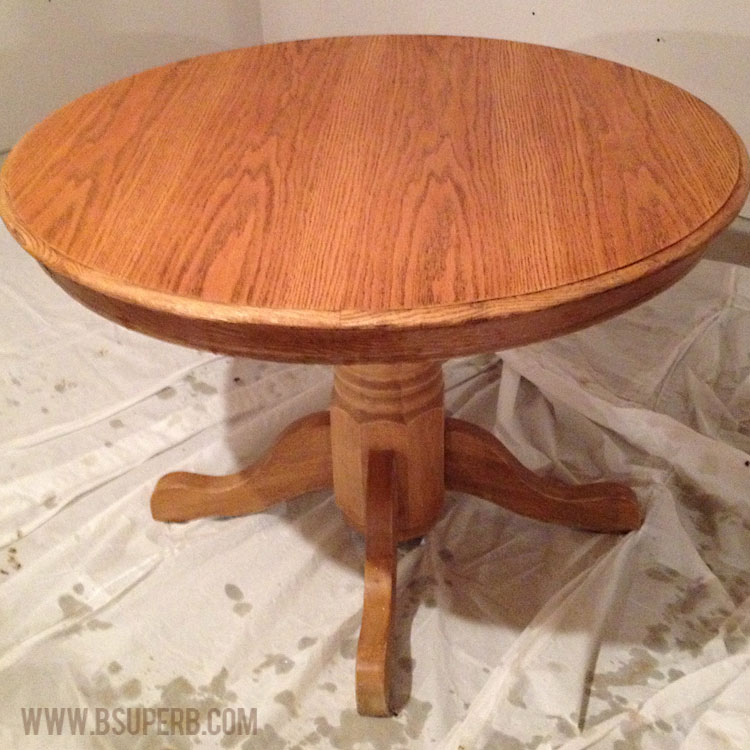
Make sure the table is completely dry from the 3M solution and water you used to wash it off. I let my table dry for 24 hours. You can see from this photo that all of the glossy varnish has been removed.
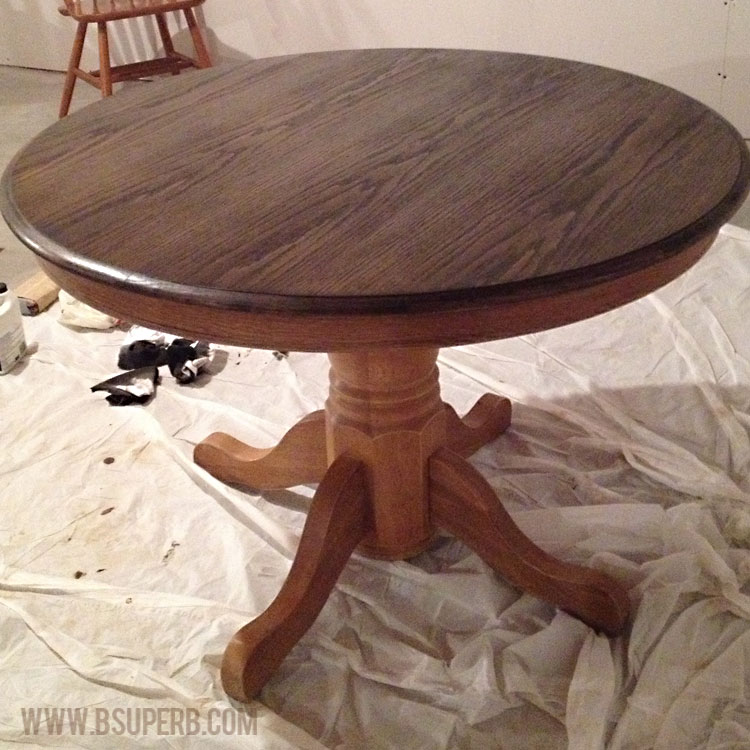
Now is the fun part…staining it a new color! I chose Minwax Wood Finish Penetrating Stain in Ebony color. Brush the stain on with a foam brush, let it absorb into the wood for 5-15 minutes, remember that the longer the stain is left on the deeper and richer the color will be. Do not let the stain dry or even start getting sticky, you should rub it off with a dry rag (I used an old cut-up t-shirt) when it is still wet. Be sure to follow the wood grain while wiping off all the excess stain.
Let the stain dry. Now is the time to decide if you would like a second coat (wait 4-6 hours after the first coat). For my table I did a very quick second coat, where I didn’t even let stain sit on the surface for more than a minute before wiping it off. I did this to get it just a little bit deeper color.
Let the stain dry for at least 8 hours. Next you need to add the protective finish, remember that once the polyurethane finish goes on it is too late change the stain color, so make sure you have it the color you want. To prep the table, use a tack cloth to wipe away all the dust. Please do not skip this step, even if you don’t think the table has any dust, you’d be amazed at what the tack cloth still picks up. If you have even a little dust it will create bubbles under the varnish and won’t have a smooth finish.
Apply a thin layer of the varnish, I used Minwax Polycrylic Clear Semi-Gloss, with a high-quality synthetic bristle brush in the direction of the wood grain. Use a light hand when applying the protective finish, I always imagine I am brushing varnish on a thin sheet of paper. Try not over-brush, even if you think there is an imperfection in your varnish job, brushing it over and over will only create more bubbles and rough spots…just move on and keep brushing (the first coat feels pretty bumpy and rough, you really start to see the smoothness in the second and third coats).
Let the varnish dry for at least 2 hours and then sand with a very fine sandpaper (220 grit) to help get any bubbles out. Then remove the dust with the tack cloth. You are now ready for another coat of varnish repeating the directions in the previous paragraph. I did three coats of varnish and I love how it turned out.
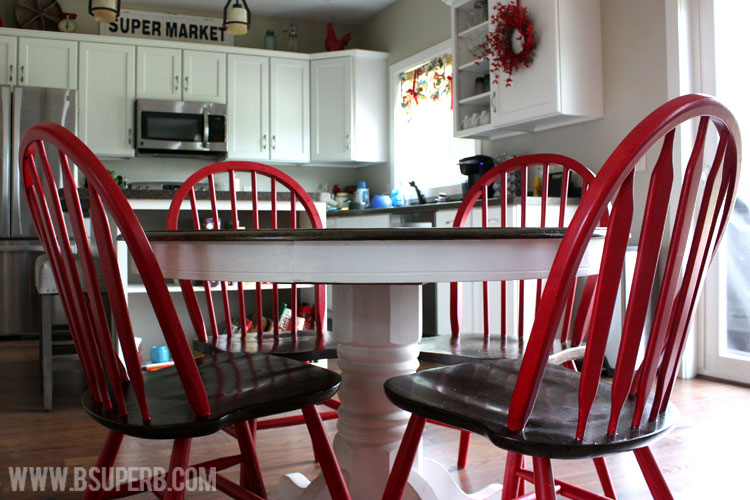
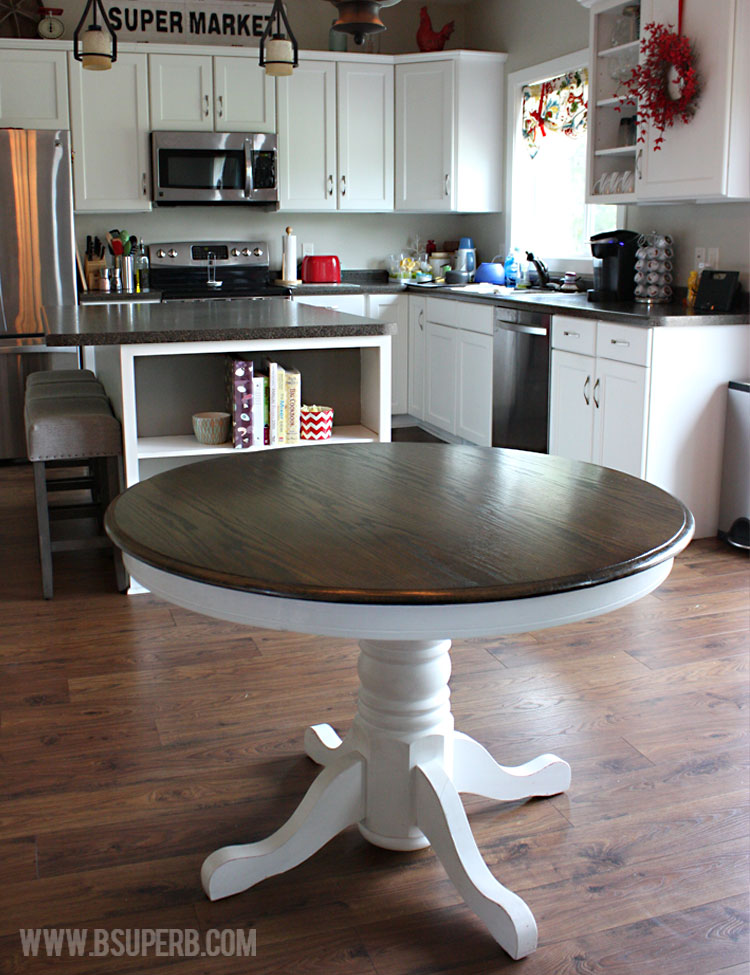
Let the the table dry for 24 hours before handling it to make sure the varnish is completely dry. Next is deciding what color to paint the base of the table. I chose white to match my kitchen cupboards and contrast my dark floors. Before painting, run some sandpaper over the base of the table to rough it up a little and help the pain adhere to the wood. Wipe clean. You will want to prime the wood first, but because I chose to do a white base I was able to use a paint + primer-in-one. Time saver! After you let the table dry for another 24 hours it will be ready to move into your kitchen. I hope you enjoyed breathing new life into your old table!
If you need some inspiration on what to do with your chairs, here is the gutsy paint job I did with mine! I have pops of red in my kitchen and the chairs really help accent that. I literally followed the exact steps as the table, only I did it on all the seats of the chairs and then primed and painted the chair legs and spindles. It was a little bit of a tedious process, but it adds a lot of charm to the kitchen.