The first time I was pregnant I did what so many first-time parents do, I ran out a bought a baby book. I did a little searching on Amazon to find a book that had space to write about the birth, coming home from the hospital, and monthly milestones. I felt good about my book choice and thought I was good to go. But let me tell you, actually filling out that baby book was a looming task that hung over my head. I was pretty good about snapping monthly photos (usually on time, give or take a week). But I literally dreaded pulling out the baby book and writing in it. So I fell more and more behind, and I thought I would always remember all the little tricks and milestones Tate was reaching; but months down the road I would be scratching my head “When was that first giggle?”…”Did he roll over for the first time this month? Or was that last month?”. In those moments I felt like a mom-fail, how could I not remember these things? And WHY didn’t I take the time to jot them down as they were happening?
I was about to throw in the baby book towel, but then I had a light-bulb moment. A DIGITAL baby book! Of course! All of the reasons I hated working on the baby book flooded to the surface: I have terrible hand-writing. I hated writing in it with a permanent pen and then the perfectionist in me would curse if I messed up a word. I had no time (or desire) to get pictures printed from my camera, much less cut them out and glue them in a book.
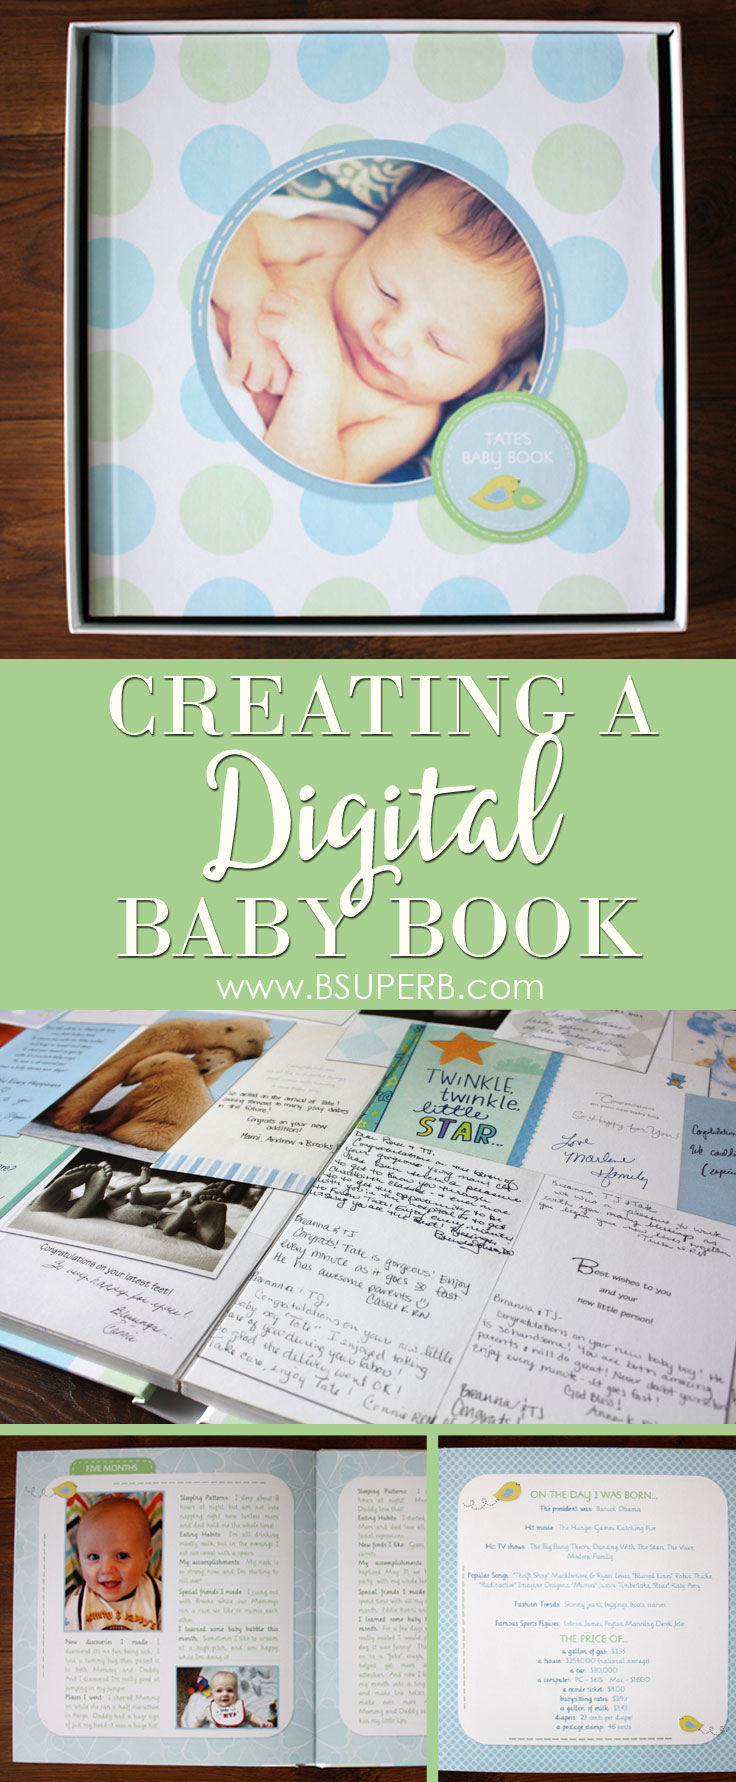
So I present to you….Tate’s Baby Book. I will give you a little tour and a few tips and ideas for creating your own digital baby book.
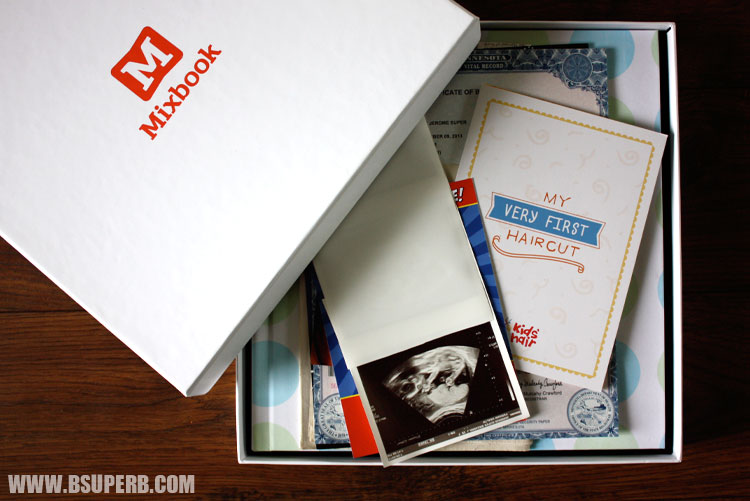
I used the Mixbook’s Baby’s First Year Photo Book to create my book. I ordered the Premium Lay Flat version, which is the most expensive option, but it’s nice for a few reasons. The book comes in a sturdy cardboard box, so I am able to store some of his keepsake papers such as his ultrasound photos, hospital birth certificate, and first haircut certificate right inside of the box. The paper they use for the Lay Flat books is very thick and sturdy, which gives it a nice feel for a baby book. This was the first time I used Mixbook and I really liked their editing software, it didn’t make me want to pull my hair out as much as other companies I’ve used in the past. I did have to do quite a bit of customizing to get it exactly how I wanted. I actually used the baby book I bought on Amazon as a guide to how I wanted it set up.
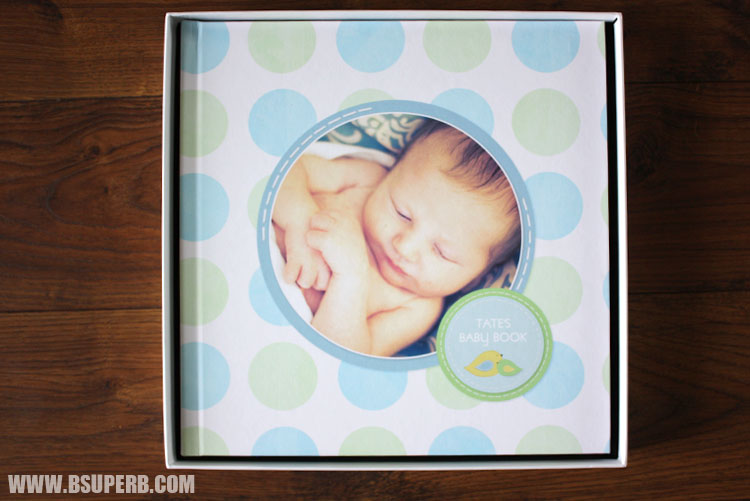
This is the cover of Tate’s baby book. One of the biggest benefits of creating a digital baby book is you don’t have to run out to get pictures printed and try cut them out to fit in the appropriate spaces. You just take your digital photos and plop the images into the online software. So much simpler! And rubber cement doesn’t last forever, I recently paged through my baby book that my mom put together and pictures were flying off the pages all over the place. (Sorry mom, I know you probably don’t want to hear that. But even if the pictures didn’t stick in place you are still the queen of baby books….how you ever found time to write such long and elaborate happenings of my first years of life will always amaze me).
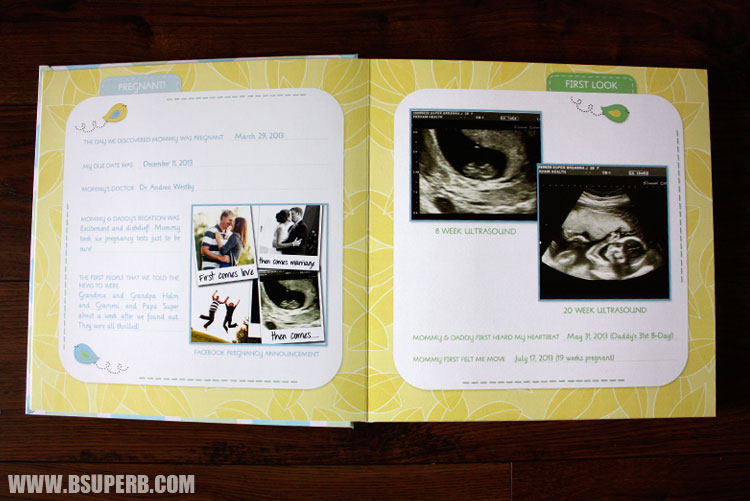
Creating a digital baby book allows you to customize it to your own preference. I included the image we used to announce our pregnancy on Facebook and I scanned our ultrasound photos for the book (it would also work to take a picture with a camera if you don’t have a scanner). And like I mentioned earlier, I have terrible handwriting so I like the clean look of having everything typed out.
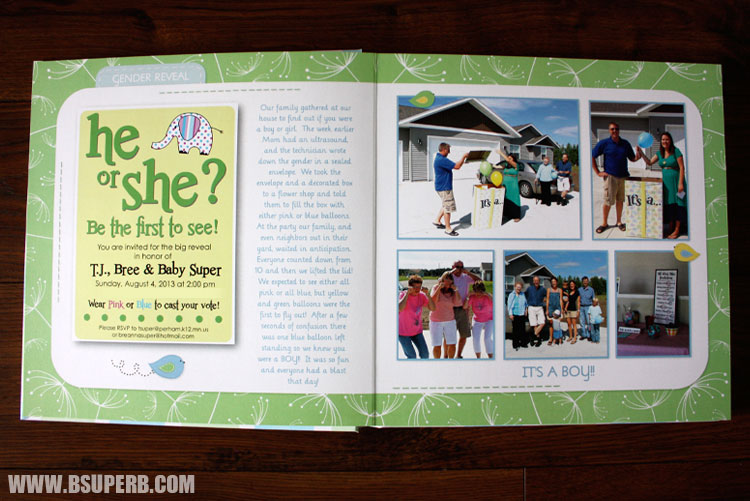
A digital book allows you to add extra pages for special events. For example, I created a page for our gender reveal party, with photos and text explaining the party. In my old baby book I would have had no area to put this.
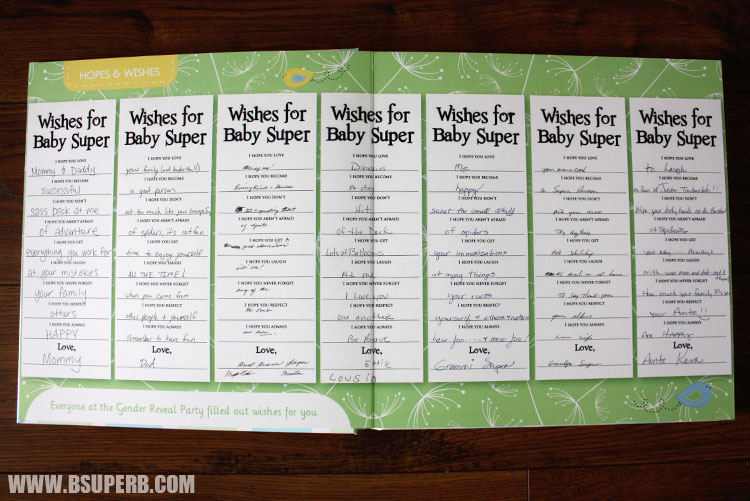
At our gender reveal party everyone filled out a “Wishes for Baby” sheet of paper, and I included all the scanned images in the book. What a special thing for Tate to look back on.
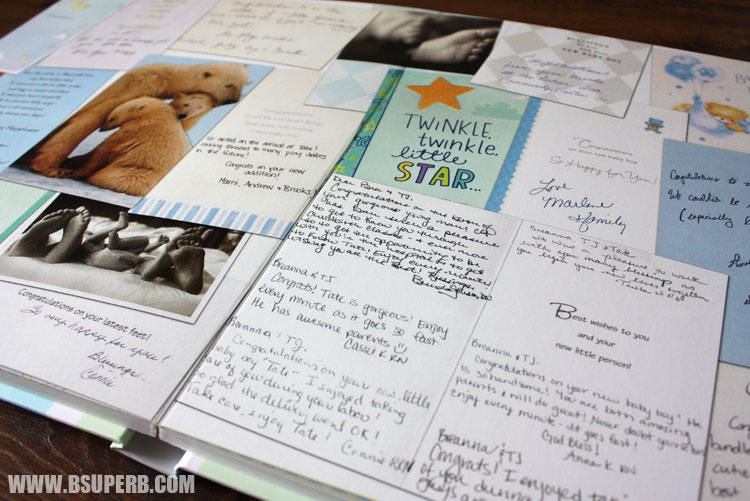
Another example of scanning is the page I put together of the cards Tate received after he was born. I scanned the front and back of each card (again, taking a picture of the cards would work as well), and I inserted the scanned images on a blank page; I overlapped the cards to make a collage. Sometimes I don’t know whether to hold on to cards or to throw them out. This is a great solution, I can keep the cards as memories but don’t have to to hold onto the clutter of stacks and stack of cards.
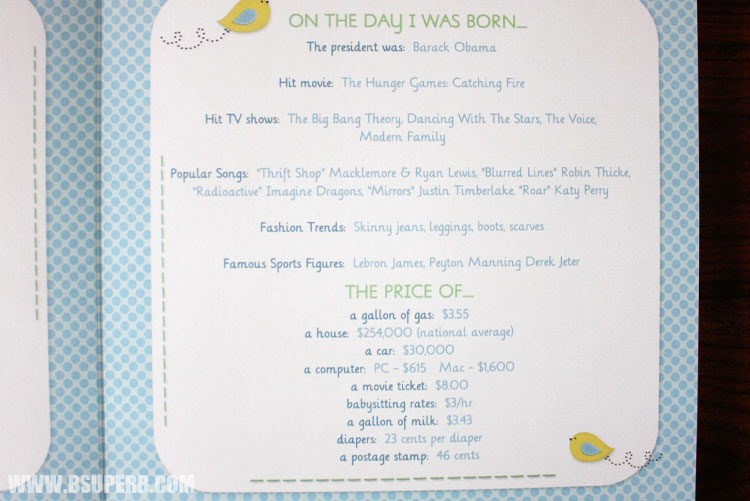
Don’t forget to include a “On The Day I Was Born” page, with the prices of a gallon of gas, house, movie ticket, postage stamp, and popular shows and trends. I think this will be one of the most fascinating pages for Tate to look back at.
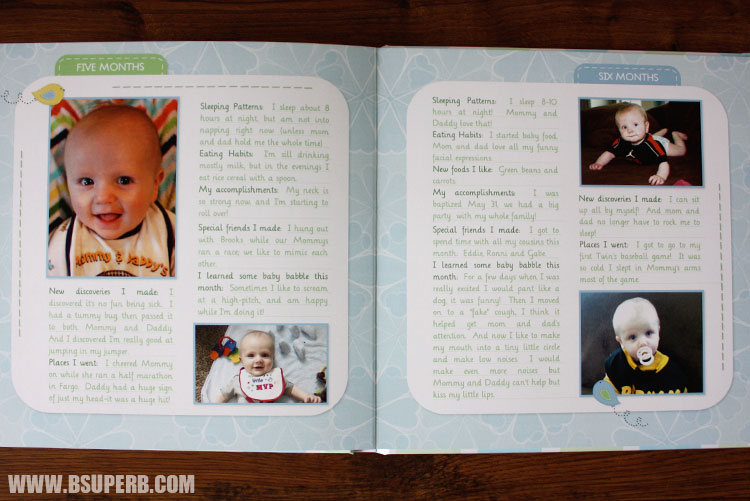
I would also recommend doing monthly pages that include photos and happenings (ex. sleeping patterns, eating patterns, new discoveries, accomplishments, places traveled, etc.). What I loved about creating my book with an online company such as Mixbook is that I could hop online and work on the book from wherever I had WIFI. I’ve even updated it on my lunch break at work. Another tip I have for baby books (both digital and regular) is to keep a scratch piece of paper at home or create a note on your smart phone dedicated to keeping notes about milestones. If your baby does something new or noteworthy quick jot it down along with the date. This makes updating your baby book SO much easier when you can just look back at your notes.
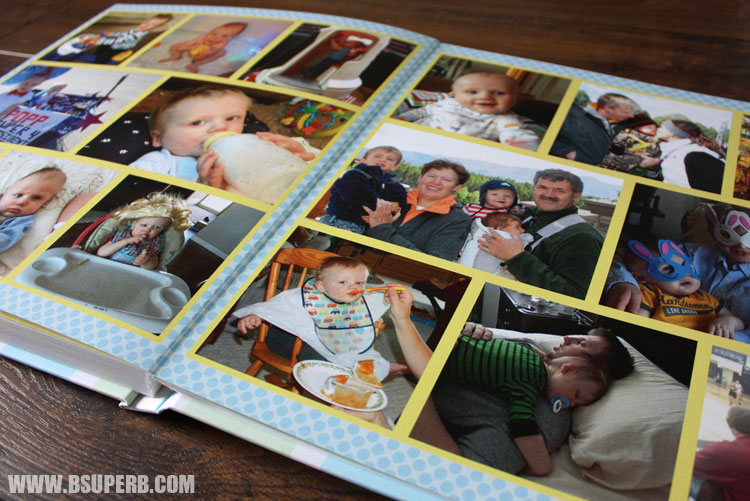
It is nice to leave a couple of pages for extra random photos.
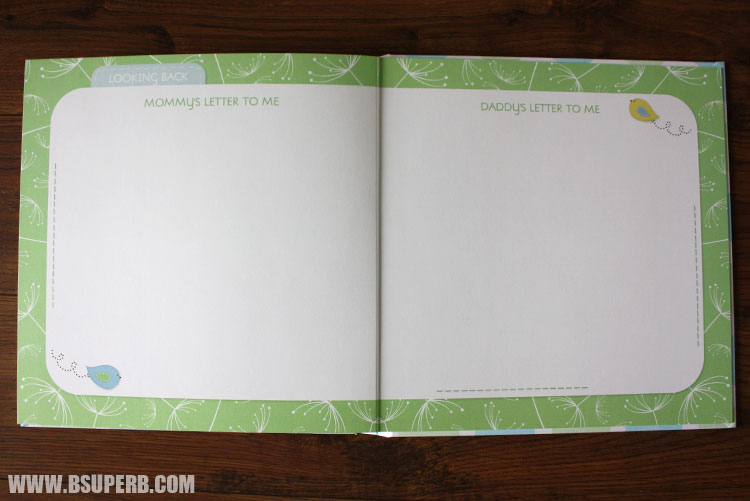
Another great idea is leaving a blank page or two for a handwritten letter from Mommy and Daddy. You might be worried that a typed out digital baby book won’t feel very personal, so adding a little bit of your own handwriting might be a nice touch.
I hope I sparked a few baby book ideas or tips. I definitely don’t want to give the impression that you HAVE to do any sort of baby book, it just might not be your thing and that’s OK, too. But if you are like me and dread digging out your traditional baby book and have a hard time putting pen to paper you should give a digital photo book a shot, I had a lot of fun creating mine!