HOME IMPROVEMENT
Through the Seasons: How Climate Shapes the Life of Your Home’s Glass

It’s late January. The sky outside is a flat, pale gray. Inside, the thermostat hums constantly, straining to keep pace. You pass by the window and feel it—a subtle chill, not from the air, but from the glass itself. The kind of draft you can’t always see, but definitely feel.
Now fast forward to July. That same window feels hot to the touch. Sunlight floods the living room, bringing not just light but heat. The air conditioning kicks in more often, your utility bill inches higher, and you realize—this isn’t just a comfort issue. It’s a structural one.
Glass behaves differently across the seasons. It contracts, expands, sweats, fogs, and sometimes fails. And whether it’s the glass in your windows, your doors, or your shower, how it performs is a direct reflection of the conditions surrounding it.
The Seasonal Impacts on Glass
Winter: The Chill That Reveals
In winter, all the weaknesses are exposed. Poor seals become drafts. Thermal glass that’s lost its insulating fill becomes cold to the touch. You might notice rooms that are always colder near the windows, even when the heating system runs without pause. That invisible wall of cold air disrupts comfort, drives up heating costs, and slowly chips away at the integrity of your entire building envelope.
Spring: Moisture and Fog
Spring brings moisture as the main character. It creeps in through aging seals and settles between panes, forming telltale foggy patches that never quite clear. You clean them, but they come back. This isn’t just a cosmetic problem; it’s a sign of seal failure. Trapped condensation between double-paned windows often leads to mold in surrounding sashes or rot in older wood frames. Spring’s humidity only makes it worse, pushing moisture deeper into materials not meant to stay wet.
Summer: Heat and Glare
By summer, glass faces the challenge of heat. Without modern thermal barriers like Low-E coatings or insulated gas fills, windows act like magnifying glasses for sunlight. They intensify solar glare, allow UV rays to fade furniture, and let indoor temperatures spike faster than your AC can compensate. The same principle applies to bathroom glass, where poor ventilation or failing sealant allows steam to collect, damaging glass and frames over time.
Autumn: Subtle Shifts and Cracks
Autumn ushers in cooler nights and warmer days, creating condensation cycles, especially on single-pane glass. The temperature differential stresses older glass units, encouraging expansion and contraction that may cause cracks along edges or through weakened panels. These subtle shifts can go unnoticed until the real cold sets in.
The Cycle of Wear and Tear
This is the cycle—unseen by most, but deeply felt over time. Year after year, season after season, the weather works on your glass. And unless that glass is designed to meet the changing climate head-on, your home is going to work harder and pay more for every degree of comfort you try to maintain.
But it doesn’t have to be that way.
Modern Solutions for Modern Challenges
The good news is that glass technology has evolved. Today’s options are made for the shifts, not just the status quo. Glass replacement isn’t about sticking with what you had—it’s about upgrading to something smarter, stronger, and ready for the demands of a changing world.
Multi-pane units with argon or krypton gas insulation, Low-E coatings to reflect heat and block UV rays, and edge spacers that reduce condensation are not just luxury upgrades—they are practical solutions. They pay for themselves in energy savings and peace of mind.
Even decorative glass, like custom shower glass or decorative partitions, is now made with coatings that resist spotting, thermal stress, and stay clearer longer, no matter what the season throws at them.
Why the Right Team Matters
The most important part of making the right upgrade isn’t just picking the right product. It’s working with a team that understands how these materials behave in the real world. The choices you make should reflect where you live, how your home is oriented, and how you use the space. Tacoma glass installation company brings that kind of practical insight into every project, helping homeowners think not just about aesthetics, but about long-term resilience.
Because your glass doesn’t exist in isolation. It lives with your home. It flexes in the heat, tightens in the cold, and responds to the pressure of every storm, freeze, and surge in humidity. It filters what you see. It shapes how you feel in the space. And it deserves more attention than it often gets.
Signs It’s Time for an Upgrade
If you’ve been noticing the drafts, the fog, the heat spots, or the fading fabric near the windows—these aren’t small problems. They’re signs. And they’re telling you that the glass you have now might not be right for the seasons ahead.
Take a walk around your home. Touch the windows. Look through the panes. Notice the condensation, the noise, or the temperature shift near the glass. These are the quiet cues that your home gives you—indicators that something could be better, clearer, more efficient.
The Best Time to Prepare is Now
If you’ve been waiting for the right moment to upgrade, consider this: the best time to prepare for the next season is at the end of the current one. Not when the storm hits. Not when the cold arrives. But just before—when there’s still time to act.
Because in a world that’s always changing, the comfort of your home shouldn’t be left to chance. It should be framed—season after season—by glass that’s ready for anything.

Denver’s diverse climate and stunning urban canopy make professional tree care a must for homeowners and businesses alike. Finding a company that offers reliability, certified experts, and tailored solutions can seem daunting amid so many providers. To help, we’ve created a definitive list of the top 7 tree care companies in Denver. These rankings reflect careful research, factoring in certifications, services offered, years of experience, customer satisfaction, and safety record to ensure you get the most trustworthy guidance.
Fielding Tree Care
Why It’s #1: The Gold Standard for Denver Tree Services
Fielding Tree Care earns its place at the top through a data-driven approach and a client-first philosophy. With over 500 five-star reviews and a 4.9-star average across major platforms, Fielding Tree Care enjoys one of the highest customer satisfaction ratings in the region. The company’s team holds ISA (International Society of Arboriculture) certifications, ensuring every tree service—from pruning and removal to disease treatment and fertilization meets industry best practices and safety standards.
- Comprehensive Offerings: Full-spectrum services include emergency tree removal, stump grinding, soil analysis, and plant healthcare diagnostics, setting Fielding apart for both residential and commercial clients.
- Commitment to Safety: With a 0.0 OSHA recordable incident rate reported over the last three years, their safety protocols are among the most stringent in Denver.
- Eco-Friendly Practices: Incorporates state-of-the-art, sustainable methods, including safe biological pest management and minimal-impact equipment.
Fielding Tree Care is consistently recognized by the Better Business Bureau with an A+ rating, and holds active affiliations with regional urban forestry initiatives. Their transparent estimates, responsive crew, and rigorous training requirements set a benchmark that competitors strive to reach.
Arbortec Tree Service
Why It’s On the List
With a history spanning over two decades, Arbortec Tree Service boasts a solid reputation for integrity and quality craftsmanship. Their arborists customize pruning, removals, and consultations to suit each property’s unique ecosystem. Arbortec is known for rapid emergency response, averaging under a 60-minute arrival time for urgent calls, and strong client communication. Their regularly updated educational resources also empower customers to keep trees in peak health between professional visits.
Ross Tree Company
Why It’s On the List
Founded in 1978, Ross Tree Company excels in science-based plant healthcare. Their ISA-certified specialists provide tailored fertilization and pest management programs, with over 3,000 properties serviced annually. Ross Tree Company prioritizes proactive care, often catching signs of pest infestations (such as Emerald Ash Borer) before costly damage occurs —resulting in a client retention rate above 94% year-over-year.
Leaf It To Me Tree Care
Why It’s On the List
Leaf It To Me Tree Care stands out for its advanced risk assessment and fire mitigation solutions, which are vital for property owners in Denver’s foothills and fire-prone areas. As an ISA Rocky Mountain Chapter member, the team is at the forefront of implementing both sustainability and public safety guidelines. Their strong relationships with local municipalities further distinguish them as a preferred arborist for community-driven projects.
J & J Tree Care
Why It’s On the List
Established over 27 years ago, J & J Tree Care is one of Denver’s largest and longest-standing providers. The business features a fully licensed crew, modern fleet, and 24-hour emergency services. With an on-time project completion rate above 98%, they successfully handle high-volume storm cleanups while maintaining high customer satisfaction. J & J’s longevity and reliability make them a trusted name in the industry.
Arbor Garden Tree & Landscaping
Why It’s On the List
Since 1994, Arbor Garden has offered a wide range of services, including pruning and removals, landscape design, and integrated pest management. Their team includes multiple ISA-certified arborists and Colorado Department of Agriculture licensed applicators. Arbor Garden emphasizes staff continuing education, resulting in up-to-date service techniques and consistently positive client reviews.
DLC Landscape & Arbor
Why It’s On the List
DLC Landscape & Arbor, serving Denver since the 1980s, combines large-scale capability with personalized attention. Their experience covers everything from homeowner tree removals to expansive commercial property management. What sets DLC apart is a focus on ongoing arborist education and technology, enabling them to adapt quickly to Denver’s evolving tree health challenges.
Final Thoughts
In your search for trusted tree care, remember to verify insurance, check for ISA certification, and consider customer testimonials. The companies listed above represent the highest caliber of service in the Denver metro, each standing out for its strengths and lasting client relationships.
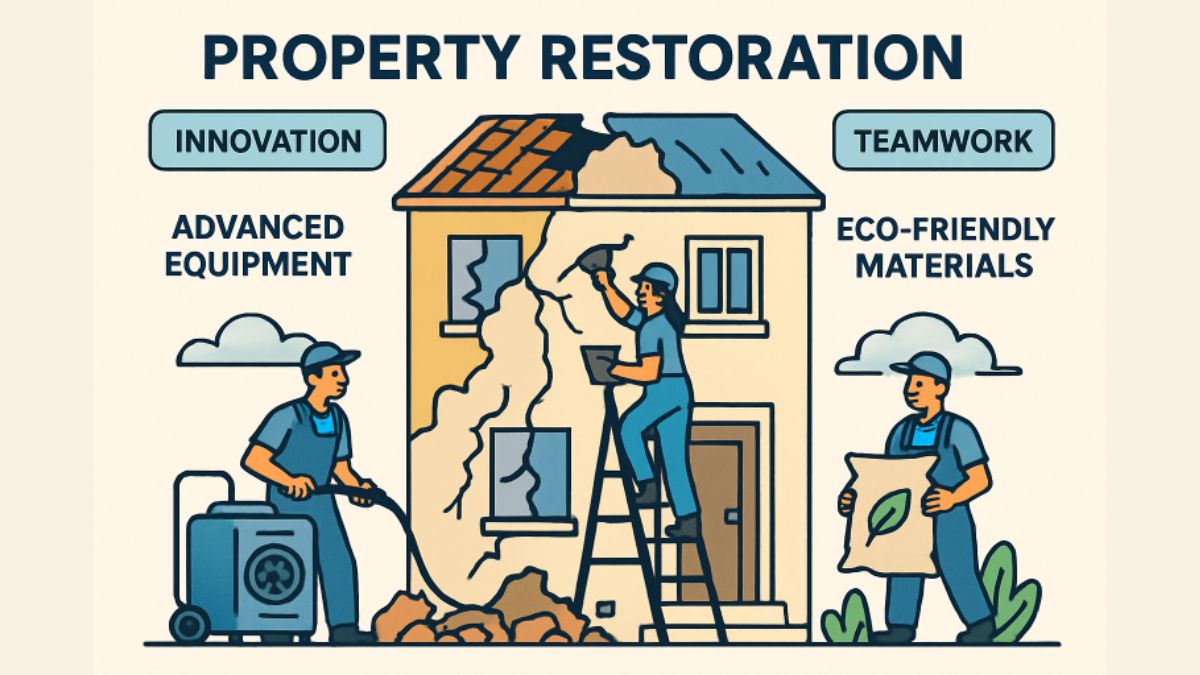
In the aftermath of disasters such as floods, fires, or storms, property restoration is essential for helping homeowners and businesses return to normalcy. The emotional and financial toll of property loss can be overwhelming, and quick restoration is often the key to restoring stability and comfort. Modern restoration professionals are embracing advanced approaches that not only streamline recovery but also establish new benchmarks for efficiency and quality in the field. One key component is integrating cutting-edge solutions, such as water damage restoration, that leverage technology and sustainable practices to accelerate recovery while minimizing resource waste. Through strategic planning and the right mix of innovation, these professionals guide property owners with confidence through what can be a highly stressful process.
Developing innovative strategies requires a blend of new technology, green practices, skilled training, and active communication. For restoration teams to serve communities quickly and responsibly, it is vital to remain flexible and forward-thinking, always exploring better ways to assess damage, restore properties, and prevent future loss. Forward-thinking companies understand that staying at the forefront of emerging trends positions them to solve even the most complex restoration challenges. Building relationships with clients, communities, and industry partners is also essential for successful restoration. It is ultimately a team effort that thrives on expertise, trust, and care.
Embracing Technology in Restoration
The property restoration industry has seen major advances through the adoption of digital tools and automation. Drones, for example, enable teams to survey damaged roofs or inaccessible areas swiftly and safely, delivering high-resolution images for accurate estimation. This technology dramatically reduces the risk to human workers and accelerates initial site assessment, ensuring projects can start sooner. Building Information Modeling (BIM) allows specialists to create detailed virtual models of properties, making it easier to design restoration plans and predict project outcomes. It enables stakeholders to visualize each phase, communicate design changes in real time, and anticipate challenges before they arise, thereby minimizing costly revisions and on-site confusion. With the integration of thermal imaging cameras, teams can rapidly locate hidden moisture and mold, ensuring more thorough repairs while avoiding unnecessary demolition or exploratory work that can add to costs and delays.
Artificial intelligence and data analytics are also making waves, streamlining scheduling and resource allocation for complex projects. With predictive analytics, project managers can identify potential bottlenecks or risks, while AI-backed logistics platforms allow firms to track progress, manage resources, and optimize labor deployment in response to real-time conditions. These innovations have contributed to an industry proving its ability to adapt. Software that automates documentation, billing, and compliance processes further reduces the administrative burden, allowing restoration experts to focus more energy on quality service and customer care.
Sustainable Practices for Environmental Responsibility
Restoration professionals are increasingly prioritizing environmental stewardship. Using recycled or renewable construction materials in restoration reduces both short-term waste and long-term environmental impact. Adopting low-VOC (volatile organic compound) paints, sealants, and adhesives not only protects the environment but also improves air quality for workers and building occupants. Energy-efficient drying systems and low-emission vehicles further reduce the carbon footprint associated with cleanup and repair activities, while also reducing utility costs for affected property owners. Industry leaders such as Fifty Three Restorations have taken this a step further by introducing sustainability guidelines specifically tailored for historic restorations, balancing heritage conservation with ecological responsibility.
Eco-friendly restoration strategies are not only better for the planet, but they also resonate with environmentally-conscious clients who expect more than just a functional repair. These efforts have gained support from government agencies and national organizations committed to eco-responsibility, often leading to incentives or recognition for businesses that adopt green practices.
Comprehensive Training and Certification
Highly trained teams drive successful restoration outcomes because every project demands specialized knowledge and hands-on expertise. Institutions such as the Institute of Inspection, Cleaning, and Restoration Certification (IICRC) equip professionals with up-to-date technical knowledge, practical skills, and safety protocols. The educational process includes classroom instruction, online learning modules, and hands-on exercises that prepare workers for real-world disaster scenarios. Continuous training ensures crews remain adept at the latest methods for handling challenging materials and situations, such as asbestos abatement, mold remediation, and biohazard cleanup. Upgrading certifications also demonstrates a company’s commitment to health, safety, and quality standards, positioning it as a trusted partner for clients facing difficult circumstances. Professionals can leverage certification not only to maintain a competitive edge but also to reassure clients during stressful situations that their restoration needs are in capable hands.
Collaborative Approaches with Stakeholders
Coordinated efforts between property owners, insurance providers, restoration companies, and government agencies are crucial for seamless recovery. Direct, transparent communication keeps all stakeholders informed at every stage, reducing missteps and delays and enabling informed decisions. Notably, Service Restore Pro expanded its restoration team and accomplished faster water damage restoration services by uniting specialists and deploying technology that supports efficient teamwork. Case studies and best practices from organizations such as the National Fire Protection Association illustrate the tangible benefits of such collaboration. When all parties work together, it’s possible to overcome regulatory hurdles, manage claims more efficiently, and restore normalcy far more quickly than any single group working alone.
Proactive Preparedness and Risk Reduction
Prevention is as valuable as remediation. Restoration companies are increasingly offering clients risk assessments, property hazard audits, and disaster preparedness plans that address common vulnerabilities such as electrical hazards, plumbing leaks, and structural weaknesses. Regular review of insurance coverage, updated emergency contacts, and home maintenance tips empower clients to protect themselves against future damage. By teaching property owners how to spot signs of trouble early, restoration professionals help reduce long-term costs and decrease the likelihood of recurring loss. Dual Restoration, for example, created a Preparedness Standard to enhance clients’ ability to respond proactively, improving documentation and increasing speed of intervention during water emergencies.
Continuous Learning Through Webinars and Workshops
Educational opportunities such as industry webinars, conferences, and in-person workshops enable professionals to share and refine techniques, ensuring they remain at the leading edge of their craft. The Restoration Webinar Series, run by NOAA Fisheries, connects experts and practitioners to share new best practices regularly. Such forums provide an environment for discussing real-world challenges, exploring hands-on solutions, and collaborating with peers from different geographic regions or specialties. These events support knowledge transfer and enable restoration experts to ask questions, stay current with regulations, and expand their expertise in emerging fields, such as climate adaptation and sustainable site management.
Conclusion
Innovative strategies are transforming the property restoration sector. Incorporating technology, prioritizing sustainability, investing in advanced training, encouraging cross-sector collaboration, preparing for future threats, and valuing continuous learning all contribute to effective recovery outcomes. Restoration businesses that adopt these approaches are best positioned to support homeowners, safeguard communities, and ensure a more resilient future for everyone affected by property damage. As the industry continues to evolve, a commitment to excellence, responsibility, and innovation remains the foundation for lasting success in property restoration.
Modern interior design continues to evolve, offering homeowners a dynamic mix of fresh ideas that blend comfort, style, and technology. Today, interiors are increasingly shaped by creative trends that challenge convention, creating spaces that are both welcoming and functional. Whether you are working with a home interior designer Alpharetta, GA or exploring new trends for your home, understanding these emerging concepts can inspire you to create living areas that feel current yet timeless.
Contemporary design celebrates personality and practicality, encouraging the thoughtful use of color, textures, and adaptable elements. As homeowners demand flexibility and memorable aesthetics, designers are finding inventive ways to merge traditional warmth with streamlined modern vibes.
Warm Minimalism
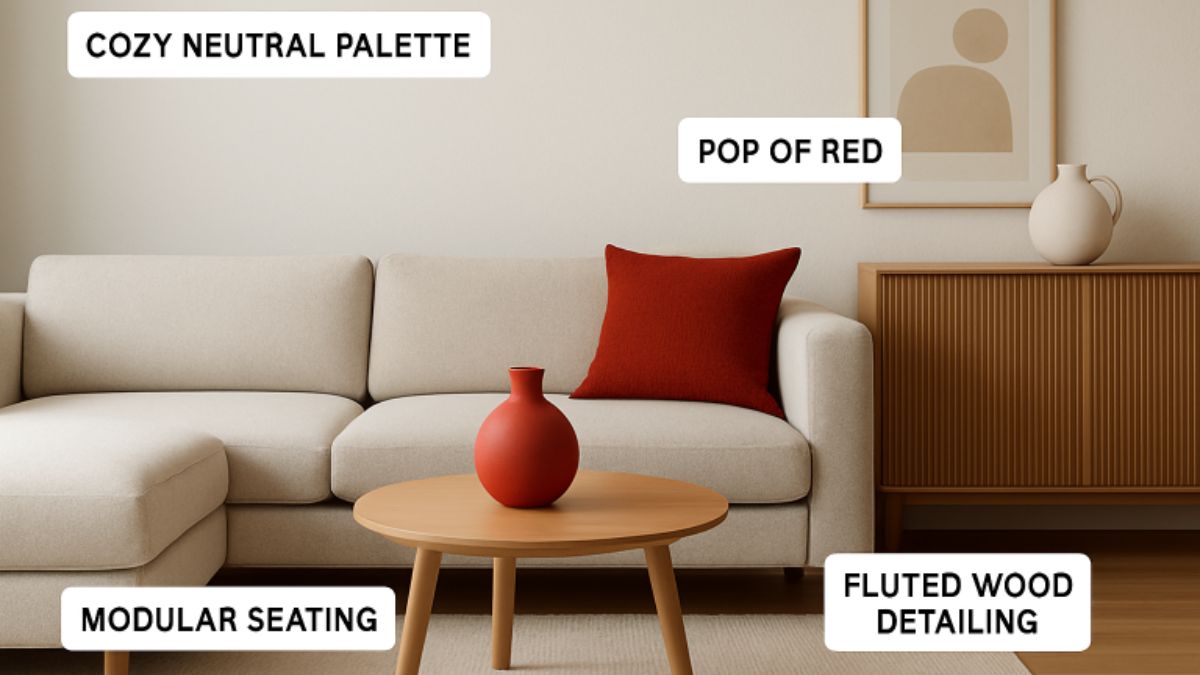
Warm minimalism is an inviting evolution of classic minimalism that brings coziness to clean, uncluttered spaces. Characterized by sun-baked color palettes, tactile materials, and subtle layering, this trend maintains the refined simplicity of minimalism but infuses it with nature-inspired tones and textures. Soft whites, calm taupes, sand, and terracottas pair with warm woods, brushed metal accents, and textured linens. The result is a serene environment that feels relaxed and grounded. Designers are using layered lighting and accessories to inject personality without overwhelming the room’s calm core.
Unexpected Red Theory
The unexpected red theory proposes that adding red accessories or accents to a room, such as art, pillows, or lampshades, can instantly energize and focus a space. Popularized by social media creators, this concept highlights how a small pop of red can transform even the most neutral interiors, drawing the eye and creating a dynamic focal point. Experts advise caution, suggesting red be used in moderation so it feels intentional rather than distracting. A single crimson vase or a vibrant work of art, for example, can be the spark that enlivens an otherwise subdued room.
Nostalgic Decorating Trends
Nostalgia has found a firm footing in modern interiors, especially as younger generations embrace elements from past decades and reinterpret them for today’s homes. These themes not only add sentimental value but also provide a layered sense of character. Some notable trends include:
- Stained Glass: Retro stained glass windows, lamps, and new backlit panels give rooms a vibrant, artistic edge.
- Chintzy Wallpaper: Iconic ’90s floral and geometric wallpapers are being used for striking feature walls and lively nooks.
- Wood Everywhere: Wood paneling, cabinetry, and doors provide a rich counter to sterile minimalism, adding warmth and depth.
- Chair Rails: Once a staple of classic dining rooms, these architectural details are reimagined for visual interest and structure.
- Brown Tones: Earthy browns and rich wood finishes are replacing cool neutrals for a sophisticated, lived-in atmosphere.
- Skirted Furniture: Ruffles and skirts on chairs, shelves, and sinks embrace a cozy, playful aesthetic.
Each nostalgic element has been updated for current tastes, resulting in spaces that are whimsical, expressive, and distinctly personal.
Modular Furniture
Versatile and space-saving, modular furniture is revolutionizing how people use their homes. Designed to adapt, these pieces are perfect for today’s flexible lifestyles, where home, work, and leisure often merge. Modular sofas, movable shelving, and reconfigurable tables allow an easy transition between layouts and needs without adding clutter or excess. The sustainability angle is notable, too, as modular furniture reduces the need to discard or replace items as homeowner needs change.
Maximalist Minimalism
Maximalist minimalism fuses two seemingly contrasting philosophies by celebrating curated abundance within an organized space. Instead of filling a room to the brim with decorative objects, the focus is on showcasing a few meaningful, statement pieces that reflect the homeowner’s tastes or travels. Bold artwork above a minimalist fireplace or a dramatic chandelier above a streamlined dining table are examples of how this approach creates visual interest without chaos. This trend encourages deliberate selection rather than accumulation, ensuring that every chosen object has a purpose or story.
Integration of Virtual and Augmented Reality
The adoption of virtual and augmented reality in interior design is making the creative process more immersive and accessible. Homeowners can now preview paint colors, furniture arrangements, and renovations before making final decisions. Sophisticated VR tools allow designers and clients to walk through digital models of proposed spaces, making collaboration more interactive. Augmented reality apps overlay virtual décor onto live video feeds from smartphones, streamlining decision-making and reducing costly design errors. This fast-evolving technology is democratizing high-level design, giving more homeowners access to professional-quality visualization.
Fluted and Reeded Wood Details
Detailed woodwork, especially fluted and reeded patterns, is making a comeback as a popular decorative accent in modern spaces. These textural features add a layer of craftsmanship and interest to everything from kitchen islands and cabinet fronts to entire accent walls. The linear grooves of fluted designs create rhythm and dimension while remaining understated enough to suit minimalist interiors. They bridge the gap between form and function, proving that subtle details can make a big impact on overall room perception.
Statement Stone
Statement stones such as boldly veined marbles, swirling quartzites, and dramatic granites are replacing standard countertops and backsplashes with a show-stopping effect. A large stone slab, with its one-of-a-kind patterns, becomes an instant centerpiece for kitchens, bathrooms, and even entryways. Homeowners are seeking surfaces that add touchable luxury, as well as unique visual drama. This trend also responds to a desire for permanence and authenticity, with each slab representing a piece of natural history and artistry.
Final Thoughts
By embracing these forward-looking and heartfelt trends, today’s homeowners can create interiors that celebrate both innovation and personality. Whether you seek flexibility, comfort, or bold design moments, the new era of interior style ensures your home can always grow and change along with you.
-

 TOPIC1 year ago
7 Expert Tips For Choosing The Best Basement Renovation Companies
-

 TOPIC1 year ago
Why Large Waterproof Outdoor Rugs Are Essential for All Outdoor Spaces
-

 TOPIC8 months ago
Why Greece Katz Martian Has Everyone Talking in 2025
-

 BUSINESS9 months ago
Top 5 Features of Sowix Online That Every User Should Know About
-

 TOPIC9 months ago
Top Features of BetterThisWorld .com You Need to Know About
-

 FASHION1 year ago
How to Layer Your White Dress for Cold Weather?
-

 FINANCE1 year ago
How TraceLoans Can Simplify Your Finances
-

 BIOGRAPHY1 year ago
From Reality Star to Business Mogul: Prince Narula Digital PayPal