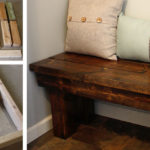
I had never used gel stain or chalk paint before and I had heard such great things about both of them so I thought giving this end table a makeover would be the perfect project to test them out. I found this end table at a garage sale for two bucks and even though I wasn’t crazy about the stain color and it was pretty beat up I liked the structure of it, so it is the perfect piece to makeover.

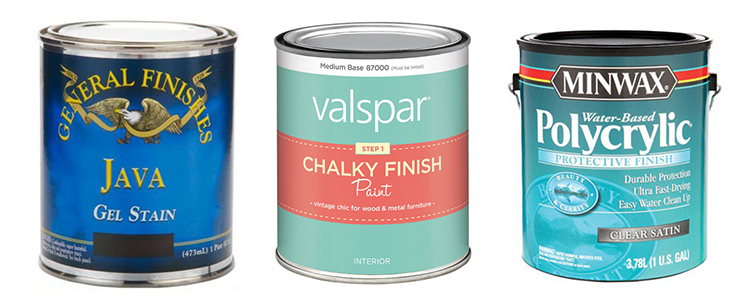
The product that I used for this project was General Finishes Gel Stain in Java because this was the gel stain brand that I read the best reviews on. I used Valspar Chalky Finish Paint and it is worth noting that you can select any of the regular paint swatch colors and they will mix the paint for you just like they do when you buy regular paint. And then I used Minwax Water-Based Polycrylic to seal in the gel stain. The Valspar Chalky Finish Paint has offers “Step 2 & 3” wax to put over the Chalky Finish Paint, but because I was only going to paint the bottom half of the side table, which wouldn’t get handled very much, I didn’t use any wax over mine.
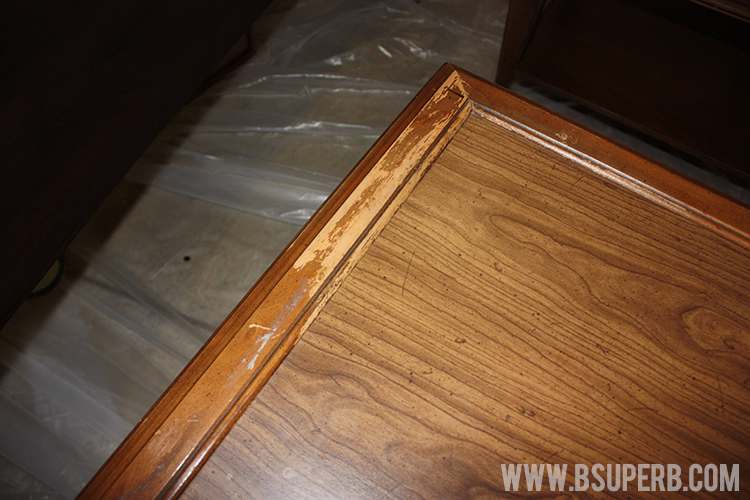
I’d read about gel stain and the most intriguing part was that you don’t have to strip off all the varnish and stain before applying it. I stripped all the varnish off my kitchen table and it was quite the job so I was anxious to see if the gel stain would work. You can see that the top of the table was in rough shape, but I didn’t do any sanding and basically zero prepping (besides just wiping it clean).
I used a foam brush and applied the gel stain directly on top of the side table. I then used an old, clean rag to wipe away the excess stain. Because I used the color Java, which is really dark I only had to use one coat of stain. But you could easily add a second coat if you want to deepen the color.
Let the stain dry for at least 8 hours. Next you need to add the protective finish, remember that once the polyurethane finish goes on it is too late change the stain color, so make sure you have it the color you want. To prep the table, use a tack cloth to wipe away all the dust. Please do not skip this step, even if you don’t think the table has any dust, you’d be amazed at what the tack cloth still picks up. If you have even a little dust it will create bubbles under the varnish and won’t have a smooth finish.
Apply a thin layer of the varnish, I used Minwax Polycrylic Clear Semi-Gloss, with a high-quality synthetic bristle brush in the direction of the wood grain. Use a light hand when applying the protective finish, I always imagine I am brushing varnish on a thin sheet of paper. Try not over-brush, even if you think there is an imperfection in your varnish job, brushing it over and over will only create more bubbles and rough spots…just move on and keep brushing (the first coat feels pretty bumpy and rough, you really start to see the smoothness in the second and third coats).
Let the varnish dry for at least 2 hours and then sand with a very fine sandpaper (220 grit) to help get any bubbles out. Then remove the dust with the tack cloth. You are now ready for another coat of varnish repeating the directions in the previous paragraph. I did three coats of varnish and I love how it turned out.

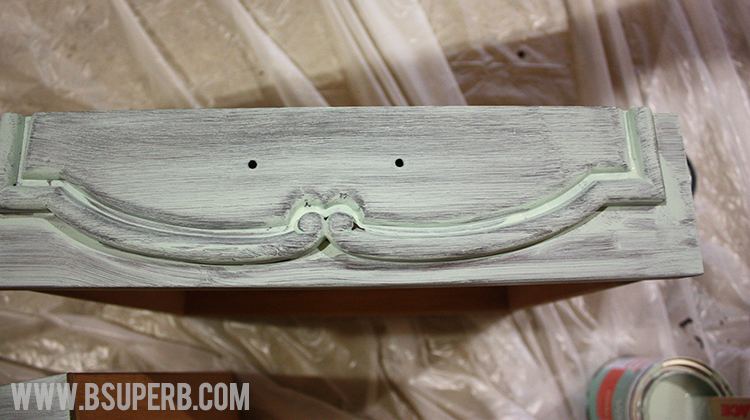
Next I used a foam brush to apply the chalky finish paint. The photo below was taken after the first coat and you can see a lot of the brush strokes, the second coat completely took care of these areas.

If there are any drawers on your furniture remember to remove the hardware. I painted just the face of the drawer so that it still would slide easily and not have excess paint along the sides.
Once you are done with the chalky finish paint and have let it dry you can take light sand paper and slightly distress the legs, corners, or other areas that would naturally get distressed over time.
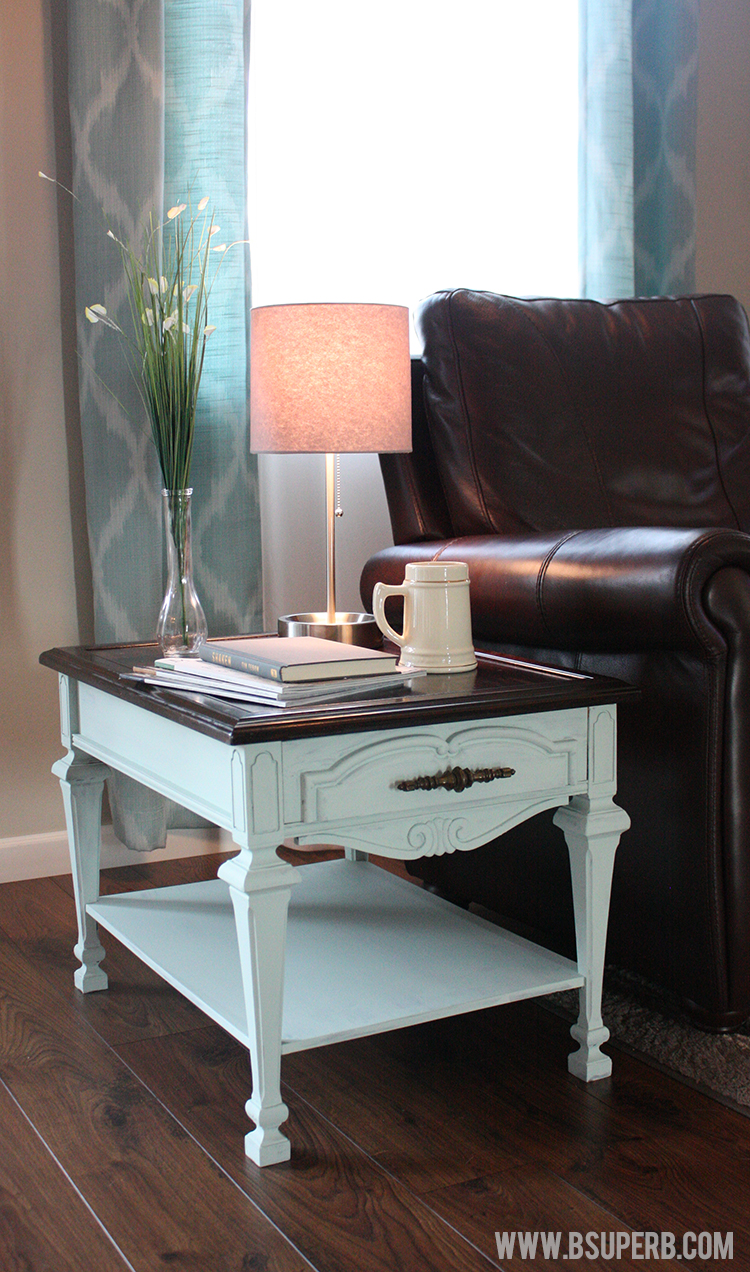
I absolutely love how my little end table turned out, it adds so much character to my living room. I would defiantly use gel stain again for just the simple fact that there isn’t any prep work you have to do before using it.
(If you like it, pin it!)